

How To Properly Install A Window Well
If you lot're thinking almost replacing a window well for the offset time – it'south a great DIY project with super functional rewards. It volition non just prevent dirt from falling on the window and water from flooding your basement, only it also provides ventilation and natural lite. The all-time part: it only takes nigh 2 and half hours and costs about $100.
For me personally, we were doing a fiddling landscaping around the business firm and putting in a concrete patio, and then it was a good time to freshen upwards two different window wells. They were corroded and poorly installed, so they looked pretty bad!
I decided to utilise a plastic, non-metal window well with a flat front end as opposed to a rounded front. Additionally, I added a translucent cover that had some structure to it, so information technology tin can sit on top and behave some load, while also letting light into the basement.
In this blog, I'll walk you through the steps of replacing a window well. This involves digging out the old window well, lining up your new one, securing it to your foundation, getting everything back to grade, and making sure your drain is good to go along the inside of the window well.
Rather watch than read? Check out this xi-minute video.
Tools and Parts Used:
- Trench Shovel
- Postal service Hole Digger Bar
- Paw Rake/Cultivator
- 1/four″ x 1 three/4″ Tapcon Screws
- 3/sixteen″ Masonry Drill Fleck
DISCLAIMER: This blog contains chapter links, which means that if you click on 1 of the product links, I'll receive a small-scale commission.
How to Install a Window Well Replacement – 5 Steps
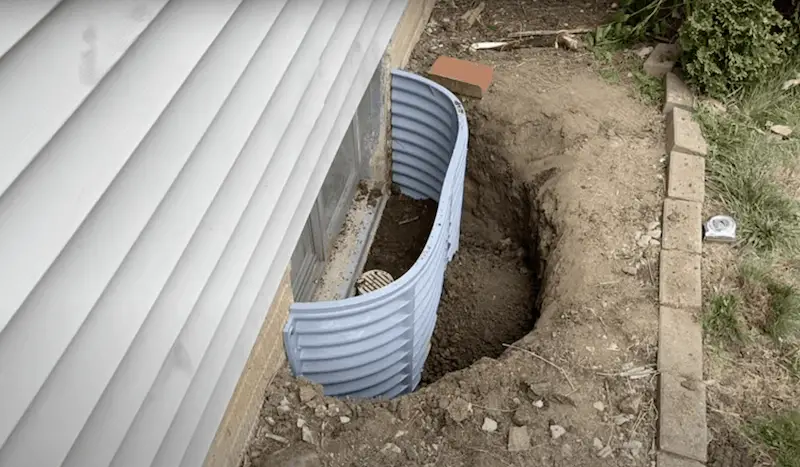
1. Dig out the old window well
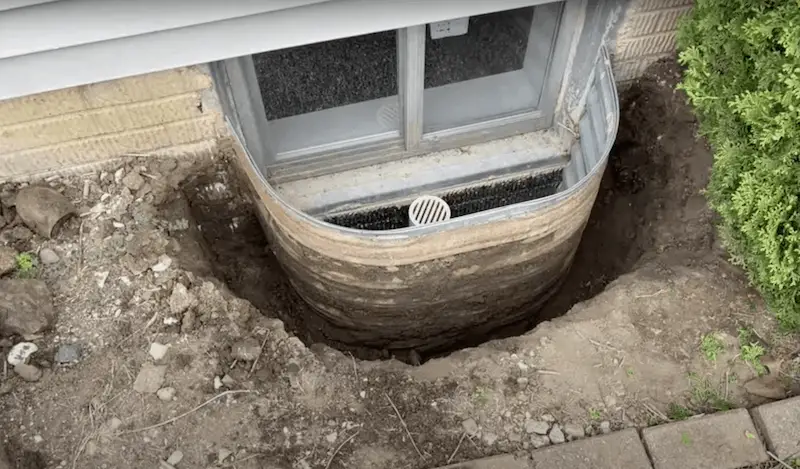
I dug everything down to the base only left a little actress dirt in considering I will be filling around information technology. For my situation, the drain was correctly positioned two to three inches below the window sill. So if water was accumulating in the window well – it would go through the drain equally opposed to wanting to come through your window and into the basement.
Also, before you lot starting time digging, make sure yous call 811 – the national "call before you dig" number. Yous want to brand certain you're non going to take whatever bug with digging almost a cable box, gas line, etc.
ii. Remove former fasteners
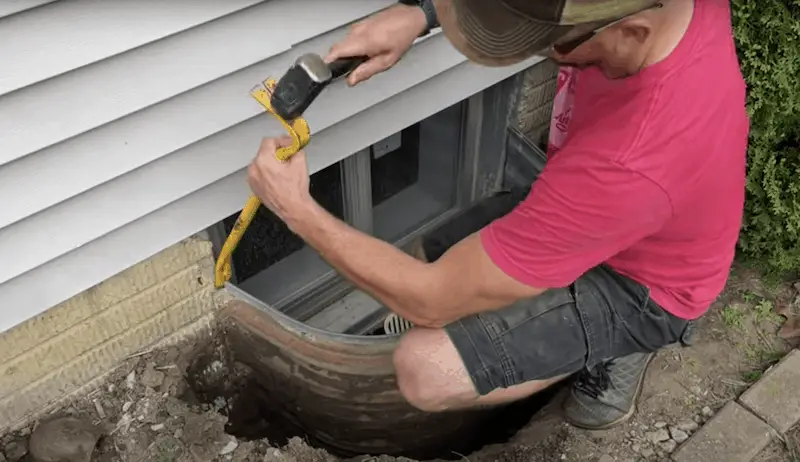
To pry off the window sill – you lot'll need to remove any old fasteners. Sometimes this procedure tin can be a scrap lengthier than you lot call up – at least for me, I had to trim the tree to get some extra room to remove them. Additionally, an oscillating tool with a metallic blade can exist your friend making modest cuts in the old window well to help remove it from your foundation wall.
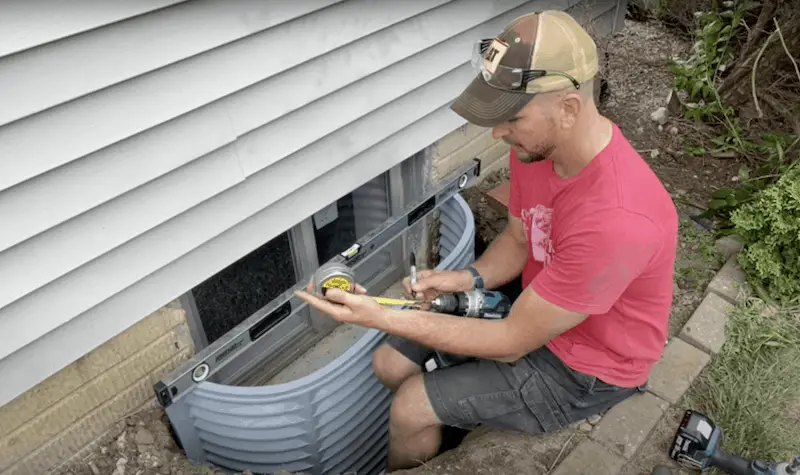
3. Brand a game plan & start setting your new window well
You'll demand to take a hammer drill handy with a 3/16 masonry drill fleck for this footstep if y'all apply Tapcon concrete spiral anchors like I did to secure the new window well.
Since I had enough room to start setting my window well, I first set my correct-paw side of the top and secured it to the foundation. I used ¼" by 1 ¾" long Tapcon concrete screw anchors later drilling my pilot holes with the 3/16 masonry drill bit.
Knowing roughly where you lot want the top of your window well, secure it in place with one screw. Then take your level and level everything up. At this betoken, one time yous know your window well is level – go down and have measurements on the inside.
My window well is plastic, so it does have a niggling bit of flex to information technology. But I all the same had to make sure I had a consequent width of the window well all the way down. To bank check this I measured to ensure consequent width on the within of the window well at the top, heart, and bottom. And you want to brand sure information technology's snug to the wall and doesn't have any gaps in information technology.
Mutual Question: How do you find the depth y'all demand to drill with your hammer drill and your three/16″ masonry drill fleck?
- Take your measuring tape and the hammer drill, and measure i 3/four″
- Do one sharpie marker on the drill for reference at 1 iii/4″. And so take that sharpie marker and run the drill slowly – making a marker around the drill. This volition requite y'all a prissy reference line for your depth judge (Go to minute 6:17 in the video to meet this process!)
While you're drilling into the foundation itself – you don't want besides big of screws that will become too deep into your foundation.
Just brand sure the screw doesn't lesser out when drilling in the Tapcons! If they do, Become back and forth just to pull the material out of the pigsty and drill some other one/4″ and so. I'd also recommend putting a galvanized washer and then that you have a piddling fleck more caput and don't pull through the flange on the window well.
Warning: Be careful not to over-tighten the Tapcons! Y'all can strip the hole out if you try to over-tighten information technology. If yous do this you will probably exist heading back to the home improvement store for larger Tapcons and a masonry drill bit.
4. Set the new window well in place
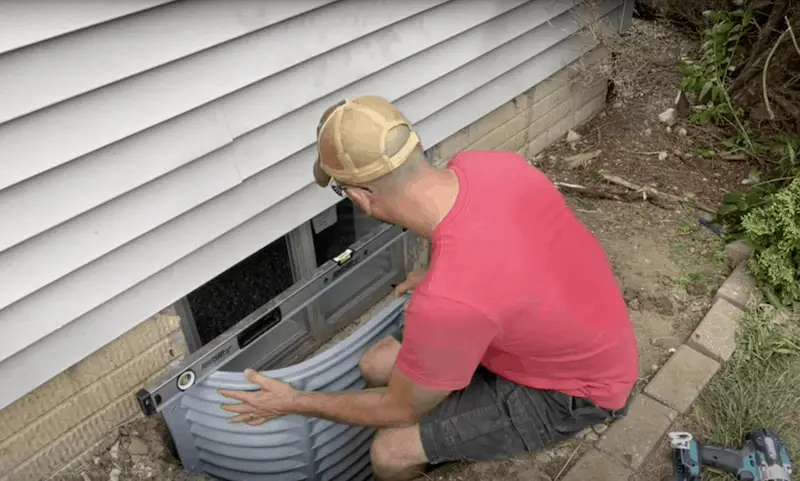
Double-bank check the level after drilling the other side. Then, drill in at least ii more holes on each side. If it's expert to become, that's all you demand to do to secure the window well.
five. Add the final touches & backfill
Finally, you'll build upwardly a petty clay in the base and put some white rock down getting it correct up to the drain level. From there, go ahead and backfill in the residuum.
The Wrap Upward
Overall, I was super happy with the cease product and I think this is a perfect DIY project. Again, it takes about ii and a one-half hours and you should wait to pay about $100, which is likely a lot cheaper compared to hiring someone to do information technology.
One lesson: the translucent cover is a load-bearing one, so you can really step on it. It didn't fit perfectly for me. I probably should have fit the cover to the window well prior to securing the window well to the foundation – merely even with that I probably would still have to alter it a chip to get it to fit. It's non a huge deal but just something to keep in listen if yous want the comprehend I used. Do some reference dimensions and some dry fits ahead of time earlier y'all're securing it to the wall to know exactly what you're facing.
Read more: A Beginner's Guide to Window Screen Repair
Source: https://everydayhomerepairs.com/install-a-window-well-replacement/
Posted by: bryanreptaked1956.blogspot.com
0 Response to "How To Properly Install A Window Well"
Post a Comment